Ultimate Guide: How to Stretch Your Lower Back After Deadlifts
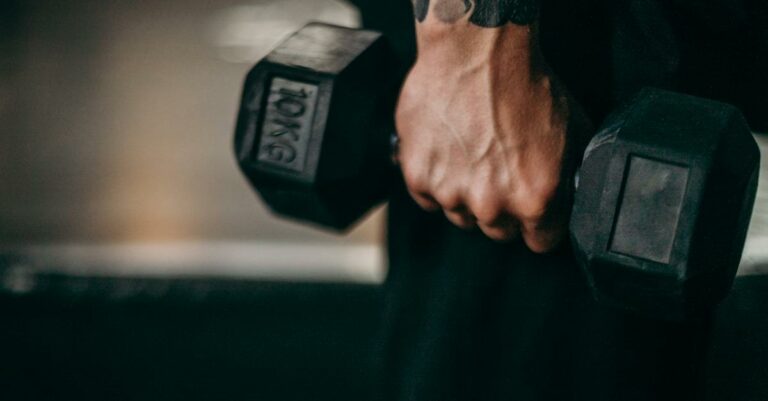
Deadlifting can be a game-changer for your fitness routine, targeting various muscle groups for that comprehensive workout feel. But let’s be honest, it can also leave your lower back feeling like it’s been through the wringer. That’s where the magic of stretching comes into play. I’ve found that a good cool-down session with the right stretches can make all the difference.
I’m not just talking about any stretches. There are specific ones that can help soothe those sore muscles and prevent any lingering discomfort. Whether you’re a gym newbie or a seasoned lifter, incorporating these stretches into your post-deadlift routine can help keep your lower back in tip-top shape. Let’s dive into how to stretch your lower back after deadlifts and why it’s a step you won’t want to skip.
Importance of Stretching After Deadlifts
Deadlifting, one of the most empowering exercises I’ve incorporated into my fitness journey, targets a wide range of muscle groups. However, the aftermath sometimes isn’t as exhilarating, particularly for my lower back. I’ve learned that the key to mitigating this soreness and enhancing my recovery lies in the disciplined practice of stretching post-deadlift. Let’s dive into why it’s so crucial.
Benefits of Post-Deadlift Stretching
After a heavy lifting session, I’ve found that dedicating time to stretch specifically targets the areas I’ve worked so hard. The American Council on Exercise underscores the importance of static stretching to cool down, and I’ve embraced this advice wholeheartedly. Stretches like the Downward Facing Dog, Cat Cow, and Forward Fold not only target my lower back, hips, and hamstrings but also offer a moment of relaxation and introspection after the intensity of deadlifting.
Another favorite of mine is the Legs on the Wall pose, which, by elevating my legs, inadvertently boosts circulation and offers my lower back some much-needed relief. This practice is not merely about physical benefits; it’s a mental unwind that prepares me for the rest of my day or a peaceful night’s sleep.
Impact on Muscle Recovery and Flexibility
Muscle recovery isn’t just about what you do during your workout; it’s significantly affected by the post-workout care you provide your body. Stretching after heavy lifting, like deadlifts, can greatly enhance muscle recovery, as it helps alleviate muscle tension and reduce the likelihood of soreness.
A fascinating aspect of incorporating stretches into my routine has been the noticeable impact on my flexibility. Initially, my range of motion, especially in the lower back and hamstrings, was quite limited. Over time, however, consistent stretching has greatly improved my flexibility, which in turn, has contributed to a more effective and safer lifting form.
Moreover, understanding the complex interplay between muscles, ligaments, and bones in our back has been pivotal. The lumbar region, where most back pain occurs, consists of five vertebrae supported by a network of muscles and tendons. Stretching aids in maintaining the health of this intricate system, significantly reducing the risk of injuries such as herniated discs, which are particularly common in strength training enthusiasts.
Foam Rolling Techniques for Lower Back Relief
After an intense deadlifting session, it’s not just my back that feels the strain. My hamstrings, glutes, and hips also play significant roles in the lift and are equally prone to soreness and stiffness. Foam rolling has been a game-changer for my recovery process, helping to alleviate pain, increase blood flow, and enhance overall flexibility in these key areas. Below, I’ll share my go-to foam rolling techniques for the hamstrings and the glutes and hips, which have significantly contributed to my lower back relief.
Foam Rolling the Hamstrings
Hamstring tightness is a common issue for me, especially after deadlifts, and it can indirectly contribute to lower back pain. To address this, I start by placing a foam roller on the ground and sitting in front of it. I then extend my legs over the roller so that it’s positioned under my thighs. By using my hands for support, I gently roll back and forth from the bottom of my glutes to just above the back of my knees. I’ve found it crucial to maintain a slight bend in my knees to avoid putting pressure directly on the joint. Spending about 1-2 minutes rolling each leg separately not only targets tight hamstrings but also helps in preventing hamstring-related lower back discomfort.
Foam Rolling the Glutes and Hips
The glutes and hips, integral in the mechanics of a deadlift, require equal attention during my recovery routine. For glute relief, I sit on the foam roller and cross one leg over the other knee in a figure-four position. By leaning slightly into the side of the crossed leg, I distribute my weight onto the working side’s glute. Then, I roll over the area for 1-2 minutes, targeting sore spots and trigger points. This technique has been especially effective for relieving glute-specific tension.
Transitioning to the hips, I shift my focus to the side muscles and hip flexors. Lying sideways, I place the foam roller under my hip and roll along the lateral aspects of my upper leg. This not only helps in soothing the hip muscles but also in alleviating tension that often radiates to the lower back. The key here is to find and gently massage those sensitive areas without applying too much pressure, which could lead to further irritation.
Reclining Hand-to-Big-Toe Pose (RHBT Pose)
When it comes to stretching after a heavy deadlifting session, I’ve found the Reclining Hand-to-Big-Toe Pose, or RHBT Pose, to be incredibly effective. It’s not just about relieving the tension in my lower back; this particular stretch also works wonders on my hamstrings, which can get pretty tight after deadlifts.
To get into the RHBT Pose, I start by lying flat on my back on a comfortable surface, ideally a yoga mat for a bit of cushioning. I keep my legs extended and my back firmly against the ground. I bend my right knee and bring it close to my chest, keeping my left leg straight and grounded.
Then, I loop a yoga strap or a towel around the ball of my right foot, holding onto the ends with both hands. Slowly, I straighten my right leg towards the ceiling, pulling gently on the strap to bring my leg closer, all while keeping my hip bones even and grounded. It’s crucial not to force anything here; I’ve learned it’s all about finding that sweet spot where I feel a good stretch without causing any discomfort.
I hold this position for about 30 seconds to a minute, focusing on deep, steady breaths. After I’ve given my right leg a good stretch, I gently release and switch to my left leg, repeating the process to ensure both sides get equal attention.
The beauty of the RHBT Pose lies in its versatility and effectiveness. I’ve noticed that regularly incorporating this stretch into my post-deadlift routine offers significant benefits for my hamstrings and lower back. Here are a few key points that stand out:
- Promotes Flexibility: This pose deeply stretches my hamstrings, increasing flexibility. Over time, I’ve seen a marked improvement in my range of motion, which in turn, has helped maintain my form during deadlifts.
- Alleviates Lower Back Tension: By extending my legs and keeping my back flat on the ground, the RHBT Pose helps to decompress my spine. This aspect is critical for me, as it alleviates the stiffness and soreness that occasionally plague my lower back after lifting weights.
- Enhances Recovery: Stretching out my hamstrings and lower back not just feels good; it accelerates my recovery. By increasing blood flow to these areas, I’m essentially helping my muscles repair more efficiently, which means I can get back to deadlifting sooner rather than later.
Incorporating the RHBT Pose into my cooldown routine has been a game-changer. Not only does it address the immediate stiffness and soreness in my lower back and hamstrings, but it also contributes to my overall flexibility and performance.
Seated Forward Fold Variation
I’ve found that incorporating the Seated Forward Fold into my post-deadlift routine significantly alleviates lower back tension. To perform this stretch correctly, I start by sitting on the floor with my legs extended in front of me. It’s crucial to keep the spine long and avoid rounding the back, as this can reduce the effectiveness of the stretch and potentially lead to injury.
I inhale deeply, lengthening my spine, and as I exhale, I hinge at the hips to lean forward. I reach toward my toes, but it’s not about touching the toes—it’s about feeling a good stretch in the lower back and hamstrings. I make sure to breathe deeply, allowing each exhale to take me a little deeper into the stretch. I hold this position for 30 to 60 seconds, depending on how tight my muscles feel on any given day.
The beauty of the Seated Forward Fold lies in its ability to target hamstring flexibility while also emphasizing proper hip-hinging mechanics. Tight hamstrings are a common issue, especially for those of us who spend a lot of time deadlifting. This tightness can contribute to lower back pain since the hamstrings and lower back are closely connected through the posterior chain.
By focusing on keeping a long spine and hinging at the hips, I’m not only stretching my hamstrings but also reinforcing the hip-hinging technique that is crucial for safe and effective deadlifting. Improving my hamstring flexibility has had a noticeable impact on my hip mobility, which in turn has made my deadlifts smoother and more efficient.
McGill’s Big Three Exercises for Lower Back
In my journey of exploring the best practices for alleviating lower back pain post-deadlift, I’ve stumbled upon what’s often called McGill’s Big Three Exercises. Named after Dr. Stuart McGill, a leading spine expert, these exercises are renowned for their effectiveness in building core stability and relieving lower back discomfort. So, let’s dive into the specifics of each exercise and how they can help.
The McGill Curl Up
The first exercise in the trio is the McGill Curl Up, and it’s quite different from your regular crunch. The goal here is to minimize the stress on the lumbar spine while engaging the muscles of the abdomen. Here’s how I do it:
- I lie flat on my back with one leg extended and the other bent to prevent excessive lumbar stress.
- I place my hands underneath the arch of my lower back for support. This helps maintain the natural curve of my spine.
- Concentrating on my core stability, I lift my head and shoulders off the ground just slightly, holding the position for a few seconds before lowering back down.
This exercise focuses on strengthening the abdominal muscles without putting too much strain on the back, making it perfect for those looking to recover or prevent lower back pain from deadlifts.
Bird Dogs
The Bird Dog exercise is all about balance and stability, two crucial aspects when it comes to supporting the lower back. What I love about Bird Dogs is their simplicity yet effectiveness. Here’s how it’s done:
- Starting on all fours, I ensure my hands are directly under my shoulders and my knees under my hips for optimal stability.
- I slowly extend one arm forward while stretching the opposite leg back, keeping both parallel to the floor. This challenges my core and forces me to engage those stabilizing muscles.
- After holding for a few seconds, I return to the starting position and repeat on the other side.
Regularly practicing Bird Dogs has significantly improved my balance and core strength, greatly benefiting my lower back health.
Side Plank
Last but not least, the Side Plank is a powerful exercise for targeting the obliques and the stabilizing muscles along the side of the spine. Here’s my approach:
- Lying on my side, I prop myself up on my elbow, ensuring it’s directly beneath my shoulder for support.
- I then lift my hips off the ground, forming a straight line from my ankles to my shoulders. This position really fires up the sides of my core.
- Holding this position for as long as I can maintain good form, I then gently lower myself down and switch sides.
Incorporating the Side Plank into my routine has not only enhanced my core strength but also added an extra layer of support for my lower back, especially useful after a heavy deadlifting session.
Additional Stretching and Strengthening Exercises
When it comes to recovering from deadlifts, I’ve found that a combination of targeted stretching and strengthening exercises can really work wonders. Not only do they help alleviate soreness, but they also contribute to a stronger back and better overall performance. So, without further ado, let’s dive into some specific exercises that have served me well.
Cat-Cow Pose for Spine Mobility
I start my post-deadlift recovery with the Cat-Cow pose. It’s an amazing way to increase spine mobility and alleviate tension in my lower back. Here’s how I do it: I get on all fours, ensuring my wrists are under my shoulders and my knees are under my hips. Then, I inhale while arching my back downward (Cow), lifting my head and tailbone toward the ceiling. After holding this position for a few seconds, I exhale, rounding my spine toward the ceiling (Cat), and tucking my chin to my chest, creating a nice stretch throughout my back. I usually repeat this sequence for about a minute or two. It’s simple but incredibly effective for loosening things up.
Knee Hugs and Child’s Pose for Lower Back Stretch
Next on my list are Knee Hugs and Child’s Pose, both of which are perfect for stretching the lower back. For Knee Hugs, I lie on my back, gently pull my knees to my chest, and hold them with my arms. I find this position helps relieve pressure in my lower back wonderfully. I typically hold this stretch for about 30 seconds to a minute.
Child’s Pose is another favorite of mine. Starting from a kneeling position, I sit back on my heels, extend my arms forward on the floor, and lower my chest towards the mat. This stretch not only soothes my lower back but also relieves tension in my shoulders and neck. Again, holding for about a minute does the trick for me.
Glute Bridges and Wall Slides for Back Support
Finally, I incorporate Glute Bridges and Wall Slides into my routine to strengthen the muscles supporting my back. For Glute Bridges, I lie on my back, bend my knees, and flat my feet on the ground. I then raise my hips towards the ceiling, squeezing my glutes at the top. I’ve noticed that strengthening my glutes plays a crucial role in supporting my lower back.
Wall Slides are a bit different but equally important. Standing with my back against a wall, feet shoulder-width apart, I slowly slide down into a squat position. It’s vital to ensure my spine stays in contact with the wall. This exercise helps me engage my core and lower back muscles, building strength where I need it most.
Legs-on-the-Wall Technique for Recovery
After a heavy deadlifting session, my lower back often feels like it’s been through the wringer. I’ve found that incorporating the Legs-on-the-Wall pose into my recovery routine can make a world of difference. Let’s dive into how this simple yet effective technique can help soothe sore muscles and speed up recovery.
Execution and Benefits of Legs-on-the-Wall Pose
To get into the Legs-on-the-Wall Pose, I start by finding a clear space near a wall. I sit with my hip against the wall and then gently roll onto my back, lifting my legs up vertically against the wall. My arms rest by my sides, palms facing up, and I focus on taking deep, slow breaths. This pose creates a slight inversion without putting any strain on my lower back. It’s surprisingly simple, but the benefits are immense.
The primary benefit I get from the Legs-on-the-Wall Pose is relief from tension in the lower back. By elevating my legs, I’m able to reduce swelling and fatigue in my lower body, which is especially useful after lifting heavy. This pose also allows my spine to realign and decompress, providing an immediate sense of relaxation. From my experience, spending about 5 to 10 minutes in this pose can drastically reduce soreness the next day.
Enhancing Blood Flow and Reducing Pressure on Lower Back
One of the key reasons the Legs-on-the-Wall Pose is so beneficial after deadlifts is its ability to enhance blood flow. By inverting the legs, this pose uses gravity to aid circulation, helping to quickly remove waste products from tired muscles. Improved blood flow means more oxygen and nutrients can reach these areas, speeding up recovery and reducing the time I have to spend dealing with soreness.
Moreover, this posture reduces pressure on the lower back. Deadlifts, despite their many benefits, can cause a significant amount of stress on the lumbar spine. Switching to a gentle inversion helps counteract this pressure. It’s a passive stretch that doesn’t require any effort, yet it deeply opens the hips and lower back, creating space between the vertebrae and offering relief from any compression caused by heavy lifting.
Conclusion: Integrating Stretching into Your Routine
I’ve walked you through the essentials of stretching after a heavy deadlift session, highlighting not just the “how” but also the “why”. It’s clear that dedicating a few minutes to stretch and foam roll can significantly impact your recovery and overall muscle health. Remember, it’s not just about preventing soreness; it’s about enhancing your flexibility and safeguarding against future injuries. The Legs-on-the-Wall pose and the specific foam rolling techniques I shared are your allies in keeping those muscles relaxed and ready for your next challenge. So don’t skip on them! Make these stretches a non-negotiable part of your post-deadlift ritual. Trust me, your lower back will thank you for it. And who knows? You might just find yourself hitting new personal bests with a body that’s more resilient and prepared than ever.
FAQ – Frequently Asked Questions
Where should you feel a deadlift?
During a deadlift, the correct form will have you feeling the exercise primarily in your glutes, hamstrings, and quadriceps. It’s crucial to maintain a proper posture to avoid putting unnecessary strain on your lumbar spine (lower back) and ensuring the hips remain higher than the knees throughout the movement.
What is a good deadlift weight?
A good deadlift weight varies depending on your lifting experience. For beginners, aiming for 85-100% of your body weight is recommended. Intermediate lifters might target 115-135% of their body weight. Advanced and elite lifters often lift between 140-200% of their body weight, reflecting their increased strength and technique mastery.